While the form builder tool is most commonly used to gather basic information, you can also incorporate data fields that exist on a custom tab. For example: If you have a tab where you are storing Volunteer information, you can create an online form that will gather not only the persons' contact information but also add information to your customized Volunteer Tab. In this tutorial, we will cover how to create a Volunteer form, but the information will be applicable to any Custom Table Form.
1. Look at your Custom Tab
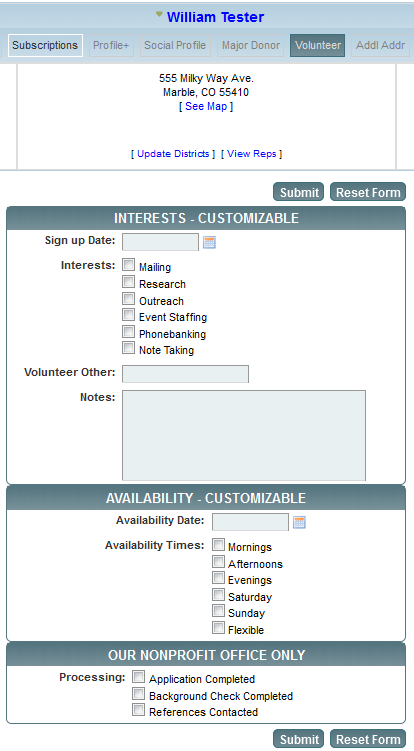
In the above example we are looking at a customized Volunteer Tab. It's important to look at your custom tab before creating your form so that you know what information you will be able to gather through your online form. If there is some information you would like to gather through your online form but do not see it as a current option on your custom tab, please request the additional data fields by submitting a support request. It's not necessary to include all of the data fields in your online form. For example we don't want the Office Only checkboxes to appear.
2. Click the Green Plus Icon to Create a New Form
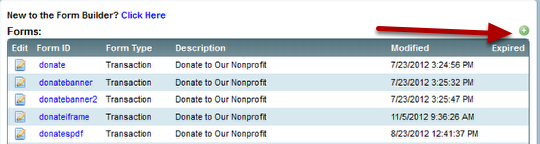
Reminder: You can access the Form Tool, by going to the Setup menu (Admin users only) and clicking 'Form Builder'.
3. Choose the Type of Form You Wish to Create
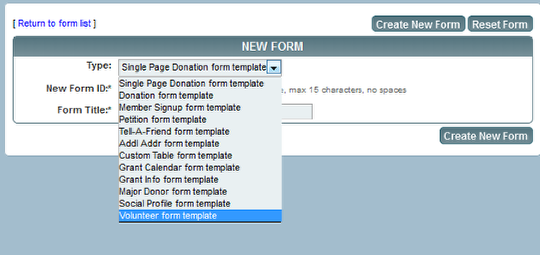
In this case we are creating a Volunteer form. If you are creating a form for a different custom tab, you would choose [name of custom tab] form template. Unless you have a pre-existing form that is linked to your custom data tab, you will need to start by creating a new form instead of duplicating the form.
Enter a unique form ID and choose a title for your form. Then click Create New Form.
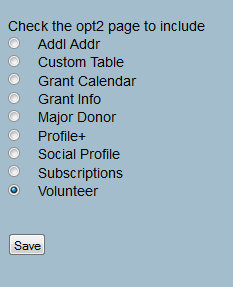
4. Click opt2 from the navigation menu

5. Choose the Name of Your Custom Data Tab and Click Save
6. Section Intro
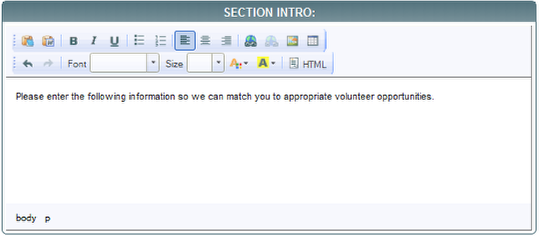
In the section intro you can add any text, images, or links that you wish using a built in HTML Editor. By default the custom data tab entry portion of your form will exist as a separate page that follows the page where people enter personal information. If you would like to merge the personal and custom data entry pages into a single page as viewed by your constituents, please contact support.
7. Control Existing Records
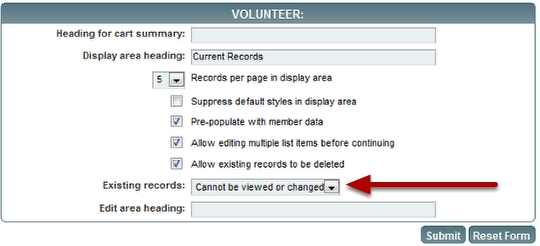
Some custom data tabs allow a person to have multiple versions rather than modifying a single record. Most of the time, you do not want to give your constituents access to view of edit those pre-existing records. In that case, you'll want to change Existing records to Cannot be viewed or changed. If you would like to create a form that allows your constituents to view or edit previous records, please contact support. When existing records cannot be viewed or changed, the options above it are meaningless.
Entering an Edit area heading will add your text as a heading with a background color above the custom table fields on the online form.
8. Display Fields for existing records

These display fields will not be displayed on the online form if the existing records cannot be viewed or changed.
9. Fields to include on edit form

These are the fields that will appear in the online version of your form for data entry purposes. Each row represents either a data field from your custom table or some text you would like to insert between prompts.
By default all of the data fields from your custom tab will be included in this section. Typically then, your editing process will be to remove data fields you don't want to appear on the form and change any captions to more user friendly text.
To reorder any of the options as they will appear on your online form, simply click and drag them to reorder.
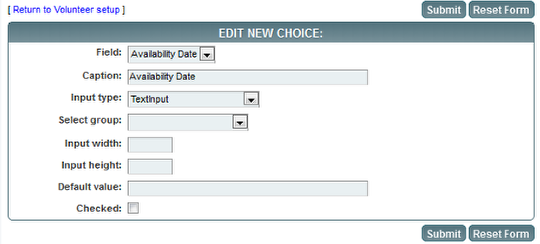
To edit the text of an option, change any properties, or remove it from the online form, click the Edit icon.
The field is what we use to match up the online form with your custom data tab.
The caption is the text that will appear next to the input on the online form.
The input type controls how your constituent will be able to enter the data or if the row is being used only for text.
- Hidden: nothing will be shown to the constituent but a default value can be entered into your database.
- Checkbox: will either create a single checkbox or when used with a select group, can create an array of options.
- Textinput: allows your constituents to enter their own text. Text input lines are only one line in height.
- Dropdown: can only be used with a select group. Allows your constituent to only choose a single option from an array of options.
- MultiSelect: can only be used with a select group. Allows your constituent to choose multiple options but is less conventional than checkboxes.
-TextArea: allows your constituents to enter their own text. The text input area can be as wide or high as you wish.
-Hidden-Current Date: No prompt will be displayed to your constituent but the current date will be filled in to your custom data tab.
-Hidden-Current Date & Time: same as above but with a time stamp.
-Formtext : only the text entered in the caption will be displayed.
-TextInput-Append: to avoid having your constituent overwrite preexisting data, choose TextInput-Append.
-Hidden-Append: to avoid overwriting preexisting data, choose Hidden-Append.
The select group corresponds to a list of options that preexists in your Databank. By default the list used will correspond to the same list that is being used in your custom table. It is possible to have this list consist of a subset of those options. If you would like to have a custom list set up for this form, please contact support with what you would like that list to consist of.
Input width and height control how large the text input field will be if you are using either a TextInput or TextArea Input Type. When using a TextInput field you can only specify the width.
Default corresponds to what information you would like entered by default. This can be used with any of the input types except Formtext. If the option is not hidden, your constituent will have the opportunity to change this before submitting the form.
If you are using a single check box, Checked will check that box by default.
10. Deleting a Field From the Online Version of the Form
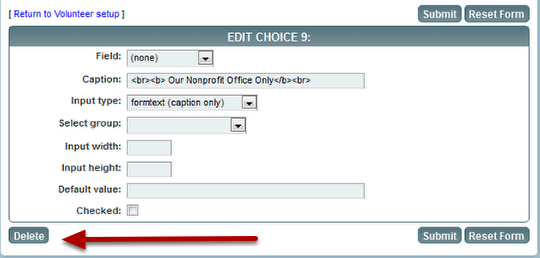
Click the Edit Icon next to the option that you would like to delete. This will take you to a new page where you can edit the option or in this case, click the Delete option to remove it. You can always recreate an option later.
11. Editing a Caption

Click the Edit Icon next to the option which has the caption you would like to edit. On the ensuing page, you can replace the default text with any text you wish. Note that basic HTML can be added to the caption to spruce up your text.
12. Adding a Hidden Date
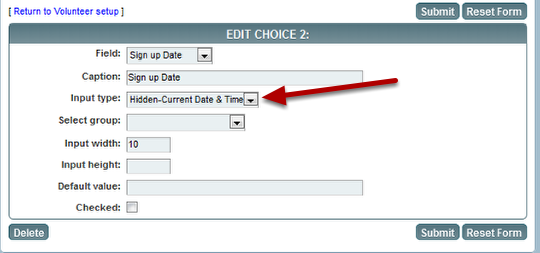
On my form I had the ability to enter a Sign up Date. It's unnecessary for your constituent to enter this as it can automatically be inserted into their record. Because the option will be hidden, it is unnecessary to blank out the caption or input width.
13. Inserting a Hidden Default Value

As an example, let's say that I'm soliciting volunteers for phone banking and don't want to allow people to specify other interests. In that case, I would change the Input type to Hidden-Append and enter a default value that corresponds to what I would like to be checked in my database.
14. Creating a New Entry Option
Clicking the green circle with a plus sign will open an Edit New Choice box. To create a new caption, choose Input type: formtext and enter your caption text.
To create an option that will fill data into your custom tab, you'll need to choose a field that corresponds to a field in your custom tab and choose an Input type.
15. Data Entered into Custom Tab
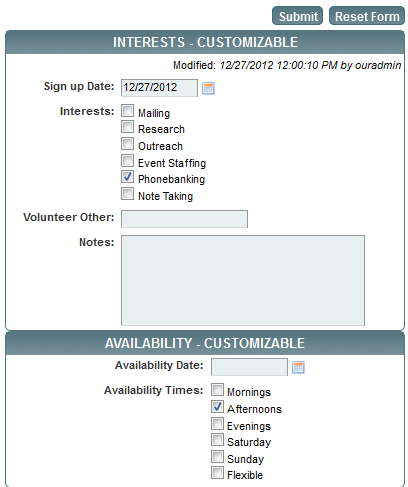
Once somebody completes your online form, the data will automatically be entered into the custom tab that is part of their record.

Comments
0 comments
Please sign in to leave a comment.